This post may contain affiliate links. Read our disclosure here.
I don’t think I’m alone when I say that I feel like the Instant Pot has taken over the Internet. It seems like all my favorite food bloggers are suddenly only posting recipes for the Instant Pot. I got one a few years ago but it sat in the corner collecting dust for quite a while before I was brave enough to actually use it. Today I’m going to share what I’ve learned through the years—consider it a crash course “The Instant Pot Beginners Guide.”
If after this introduction you’re still not sure about it, maybe ask among your friends and see if anyone has one you could borrow for a weekend!
Instant Pot Beginners Guide
Instant Pot Basics
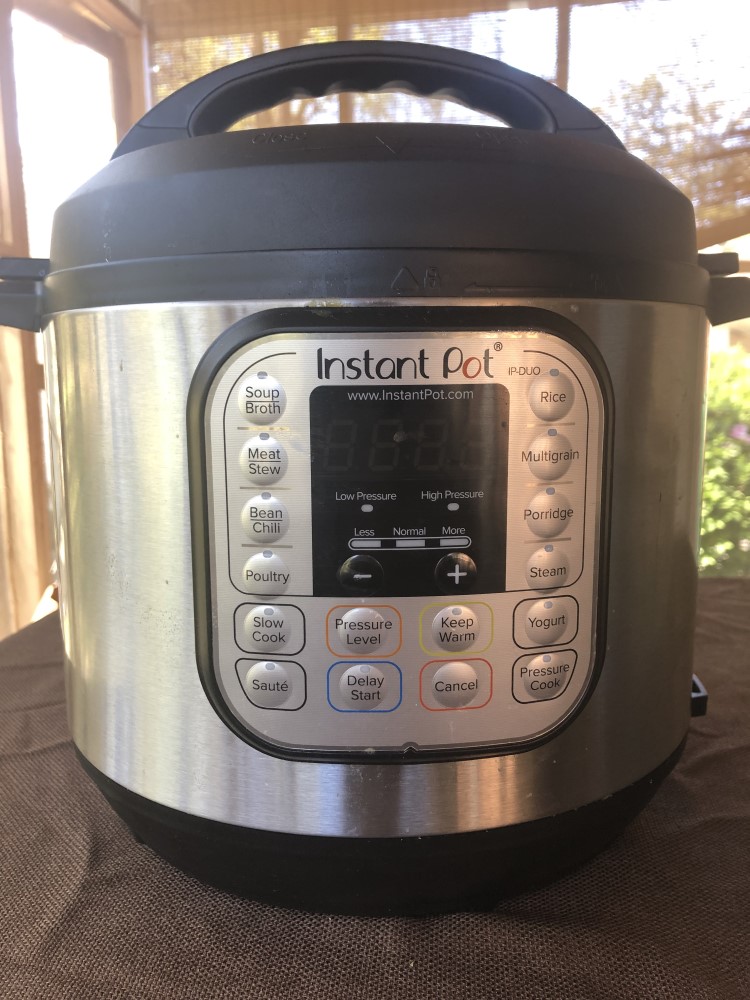
I have the Instant Pot Duo, so I’m going to show you some of the technical aspects of this particular model, but many of the tips and tricks I’ve learned should apply to most pressure cookers in terms of how to convert recipes, releasing the pressure, and the best recipes to try.
My Instant Pot came with several brochures and booklets including a manual, a recipe booklet, a quick guide, and a cooking time guide. I did skim through the manual, but the quick guide and the cooking time guide have been the most helpful.
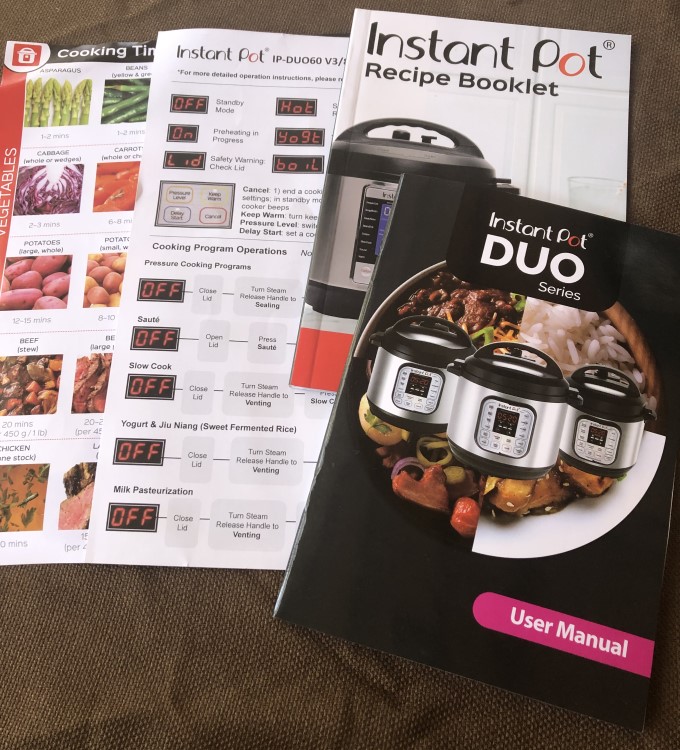
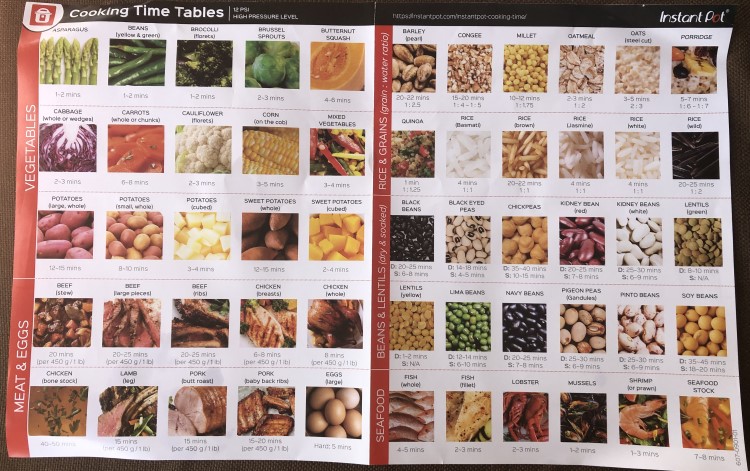
The cooking time guide doesn’t cover all the basics, but it’s a good place to start. Because I was so nervous at first, though, I got a second opinion on the cooking times by googling whatever I was trying to cook to make sure it was a good amount of time. For the ones I’ve tried, though, these cooking times have been pretty accurate.
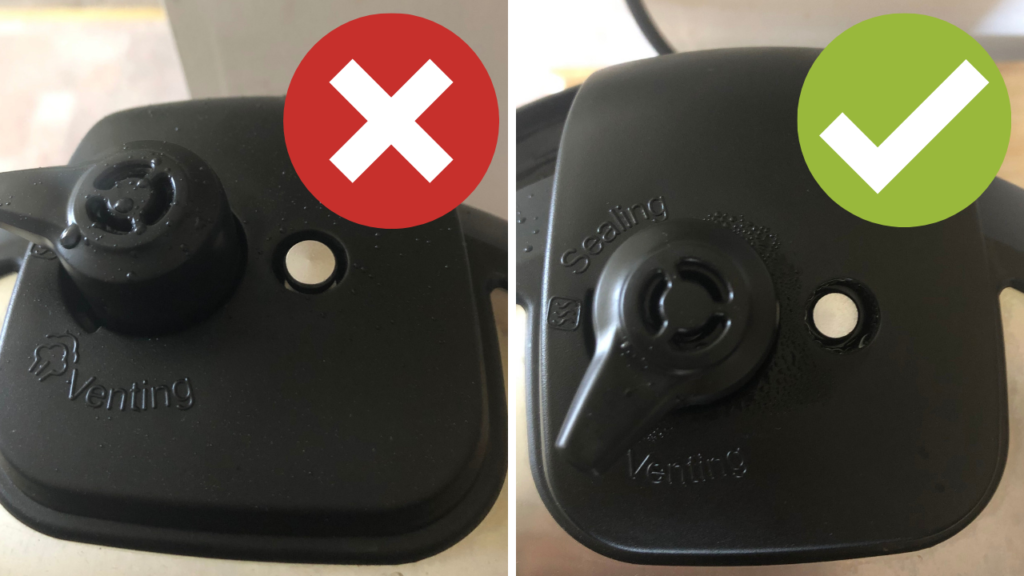
I truly feel like the most important thing you need to be familiar with before you start cooking is the part of the lid that contains the steam release and the float valve. While this doesn’t really affect how good your food will taste, it will make sure no one in the kitchen gets hurt! The basic things to know are that when you’re cooking, the steam release handle should be set to “sealing,” as in the picture below.
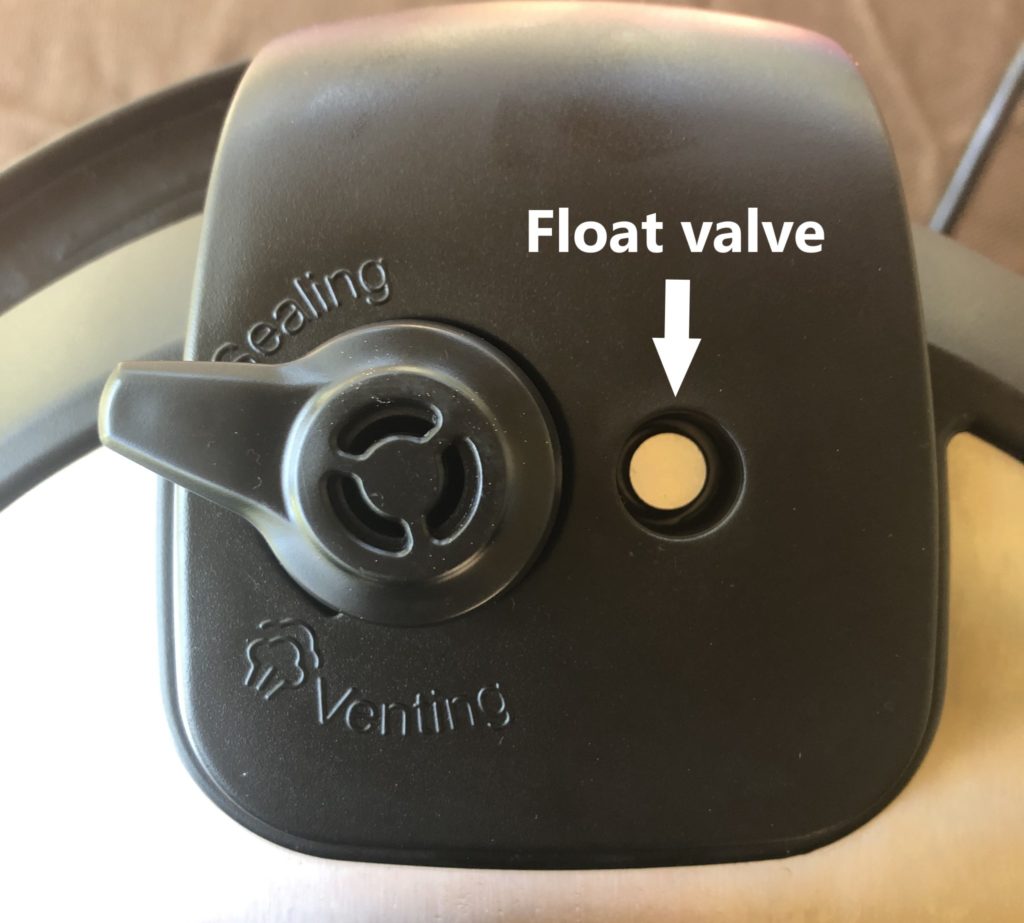
To release pressure, you turn the handle (with the end of a spatula or wooden spoon, not your hand!) to “venting.” When the Instant Pot has achieved the appropriate pressure, the float valve moves upward and becomes level with the lid (in this picture, the float valve is down). If you only get one thing out of this post, remember: Never try to open the lid when the float valve is up! Some of what I’ve read says it’s impossible to even open the lid when the float valve is up because the pressure is so high, but the danger is that attempting to open the lid at high pressure could cause the lid to fly off and incredibly hot steam to be released, so really don’t try it!
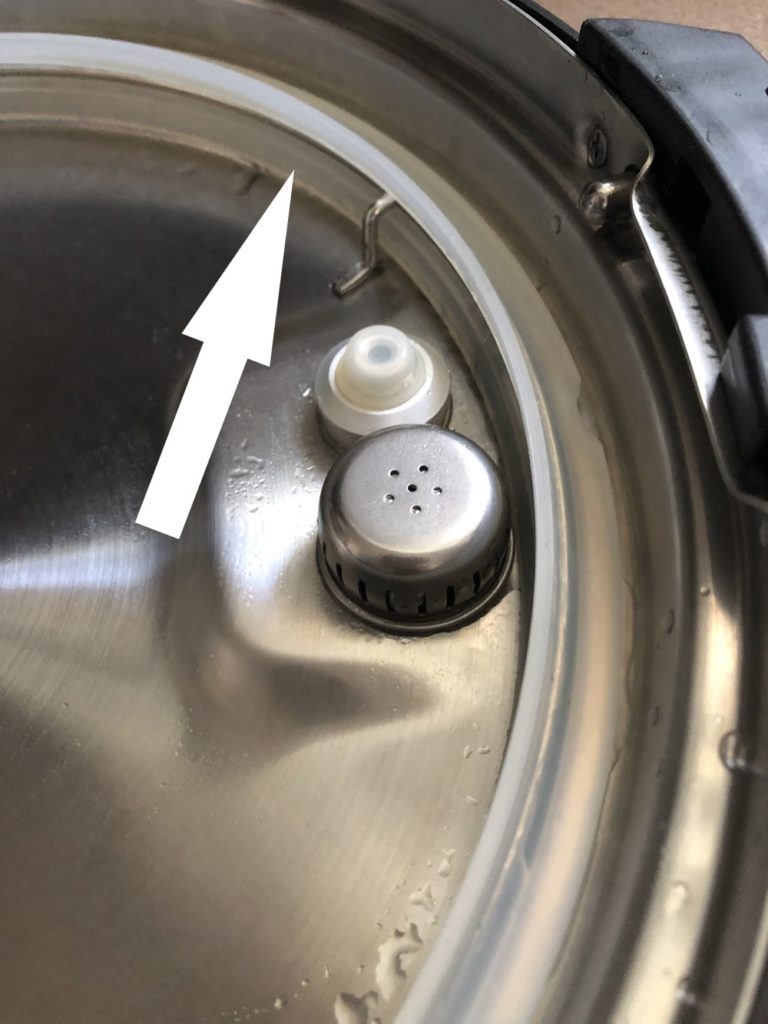
Another important thing to know is how to clean the Instant Pot. The inner pot is removable and can be put in the dishwasher. The lid can go in the dishwasher, but it’s not recommended because the rubber lining (see picture below) that keeps the lid sealed can become warped. That lining can be taken out, but it’s tricky to get back in. I only take it out when I feel like there is gunk down underneath it. Most of the time it’s just wet from all the steam. Just wipe it down with a rag after cooking.
There are several different accessories you can get for your Instant Pot. It comes with the trivet, seen below. I use this when I’m making hard-boiled eggs or for certain cuts of meat.
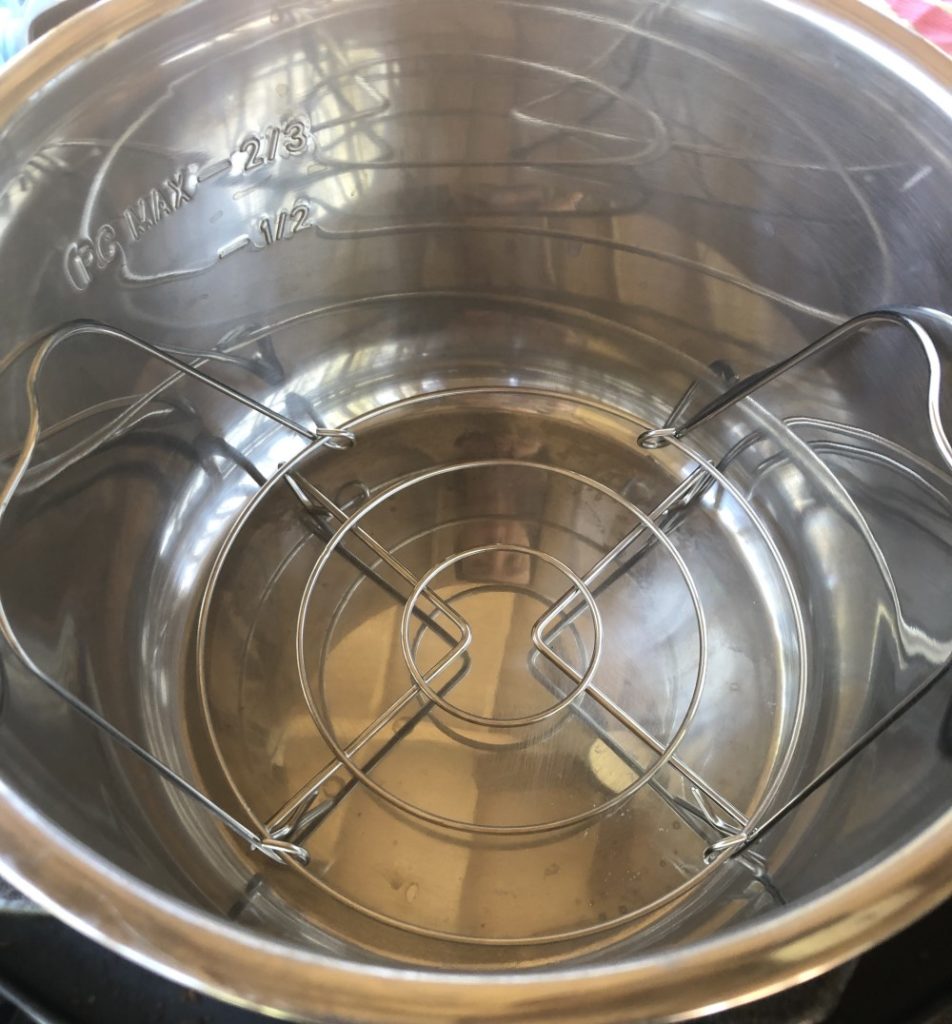
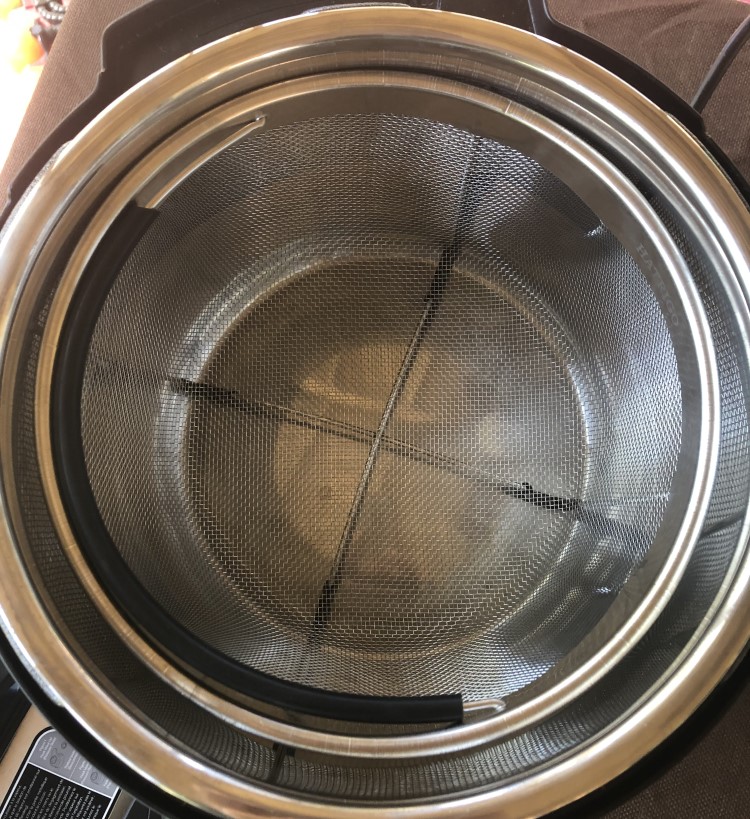
I also decided to purchase a steamer basket that nestles right down inside the Instant Pot. This is great for cooking vegetables. On my Amazon wish list I also have a cheesecake pan, because I’d like to try using the Instant Pot to make desserts.
Cooking with the Instant Pot
I was really nervous the first time I tried to make something in the Instant Pot, but thankfully, it was uneventful. I started with brussels sprouts because it didn’t seem too hard to mess up steaming vegetables.
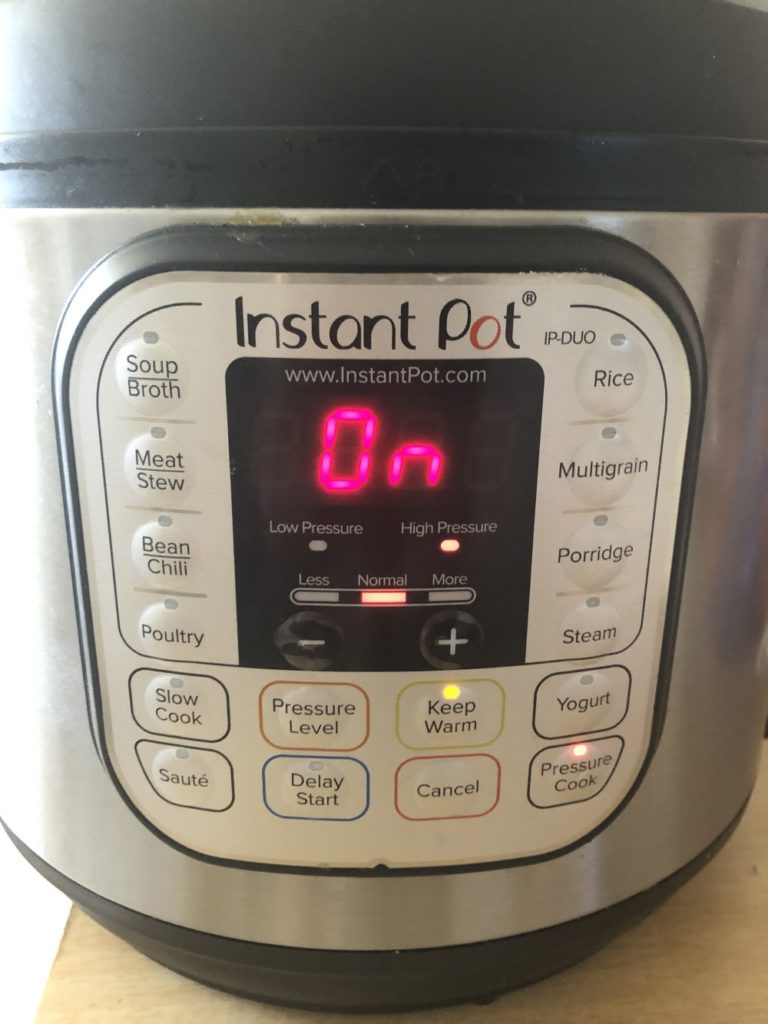
The most confusing thing for me was figuring out what the screen on the Instant Pot was trying to tell me. When the Instant Pot is unplugged, obviously there is nothing on the screen. Once you plug it in, you’ll see this:
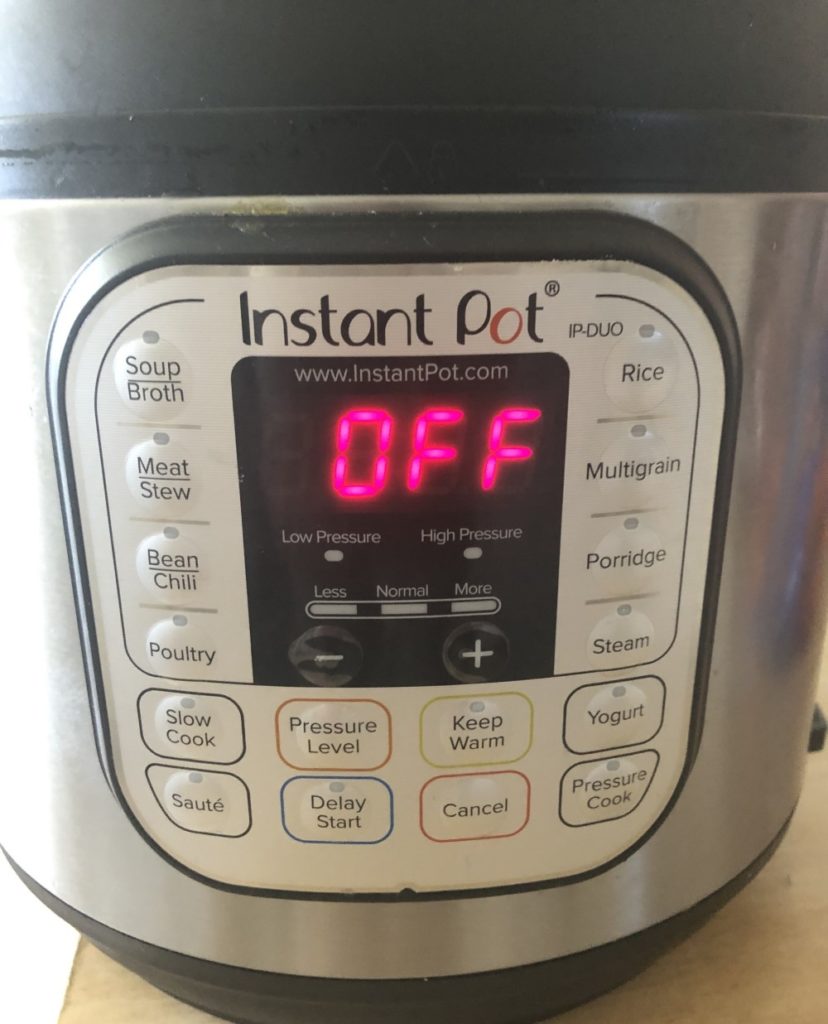
The only setting I’ve used, and the only one I’ve seen recommended (other than the yogurt button) for actual pressure cooking is the “Pressure Cook” button. I have also used the Saute button, but that is done with the lid off. When you select the “Pressure Cook” button, the screen will change to a timer and you’ll use the plus and minus buttons to change the amount of time.
Note: The delay start feature is awesome if you want dinner ready at a certain time, but I don’t recommend that you use this until you’ve made at least 10 different things in your instant pot. It’s tricky to time how long it will take to reach pressure and to not over cook if you aren’t home in time.
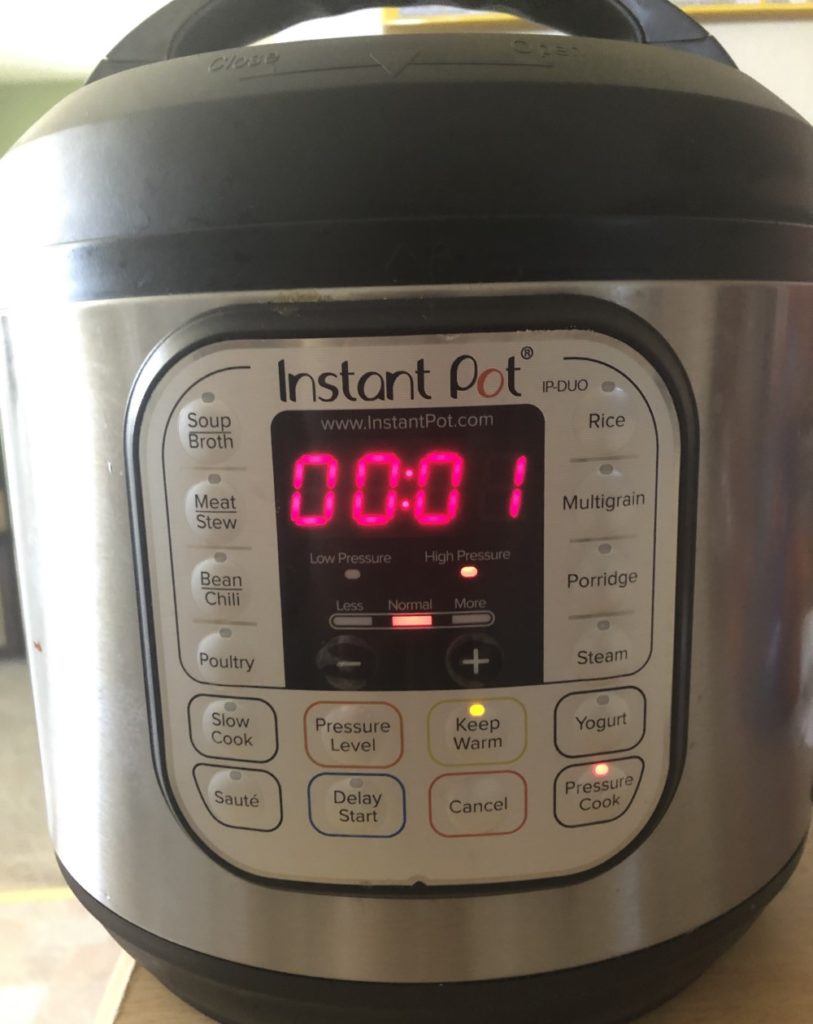
Once you stop adjusting the time, nothing will happen for a few seconds, and then the screen will display “On.” This means the Instant Pot is coming to pressure. Depending on what you’re cooking, this could take anywhere from a few minutes to a pretty long time. One time when I cooked about 4 lb of chicken, it took almost 30 minutes for it to come to pressure.
Tip: There is a max fill line inside don’t go above it. If you do, it will never come to pressure! We learned this the hard way trying to make corned beef and cabbage for a large group.
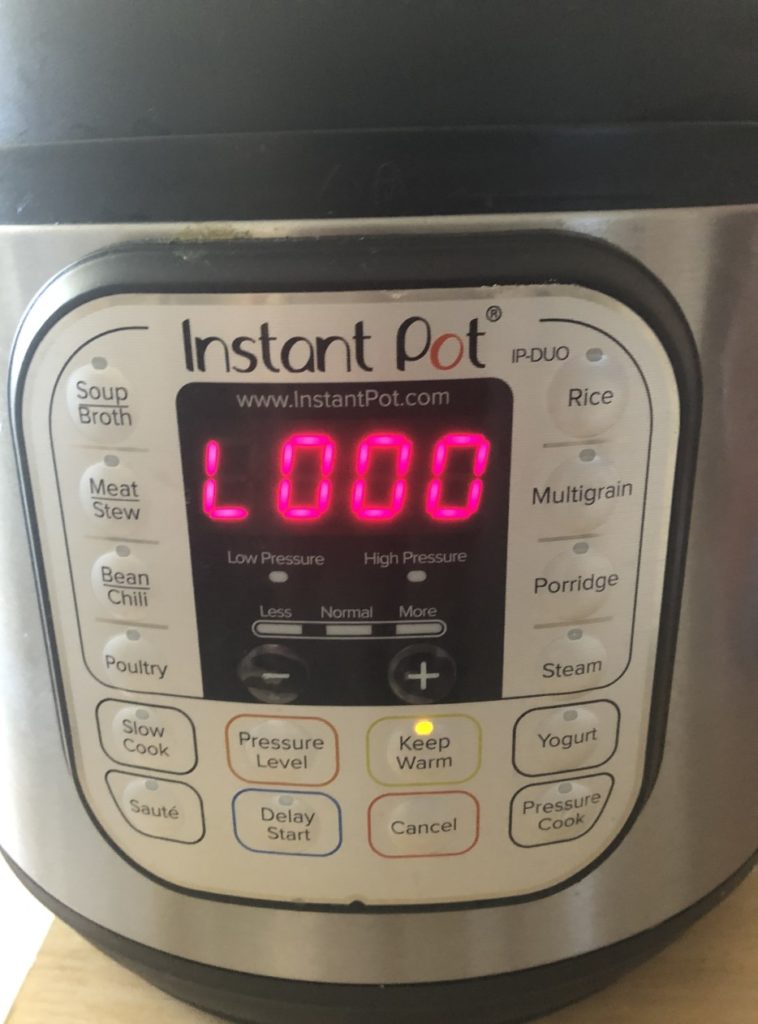
Once it has come to pressure, it will again display the timer that you saw at the beginning and start counting down. Once it’s done, it will display “L0:00” and begin counting up. Now the screen is timing how long it’s been since the food finished cooking.
When the food is done cooking, you have two options: let the pressure slowly release on its own or force the pressure to release immediately. If you let it release on its own, you don’t have to do anything but wait. This is often referred to as “natural release” in recipes. If you want to force the pressure to release, which is important when cooking something that you want to keep from getting mushy, you’ll do a “quick release,” which involves turning the steam release handle and letting the steam out.
This is the point when you’ll want to use a wooden spoon, make sure the Instant Pot isn’t right under a cabinet, and take a step back. The steam comes out at very high pressure and is extremely hot.
Once the pressure has released, you can open the lid. The pictures below are to remind you when to open the lid! Never try to open it when the float valve is up and the handle is set to “sealing.”
With these tips, you’re ready to start cooking! I recommend starting with some recipes that require few ingredients and won’t be a big deal if they don’t turn out well.
Get Started With Hard Boiled Eggs
One of the first things I ever made in my Instant Pot was hard-boiled eggs. They’re so easy!
- Place 12 eggs (yes, a whole dozen) in the steamer basket or on the trivet rack and add 1-1.5 cups water.
- Manually set the Instant Pot to pressure cook for 5 minutes.
- When the timer is done, let the steam naturally release for 5 minutes. Manually releasing the rest of the pressure.
- Remove the eggs and rinsing them with cold water.
Steaming vegetables is another easy place to start. Whenever I try a new one, I just google “carrots instant pot” and try to figure out the right amount of time to cook them, which is usually less than 5 minutes. I love being able to start a vegetable in the Instant Pot, then forget about it while I cook the rest of dinner.
Looking for some other fun recipes to start with? Check our our list of 100 Recipes for the Instant Pot!
