This post may contain affiliate links. Read our disclosure here.
I was at a big box store recently in their dollar section and found some really cute pumpkins that almost looked like they have been crocheted. I bought a few, and then began to wonder if I could make something similar on my own. I did a bit of googling and came up with a method that is super easy and requires NO glue or anything messy (other than the foam inside the pumpkins, but more on that later). I took the supplies to make these to a ladies’ night at church a few weeks ago and everyone became obsessed. The women of our church are now drowning in homemade yarn pumpkins. Not only are these cheap to make, but the process of making them is really cathartic, and I love that you can choose from whatever color yarn you can find.
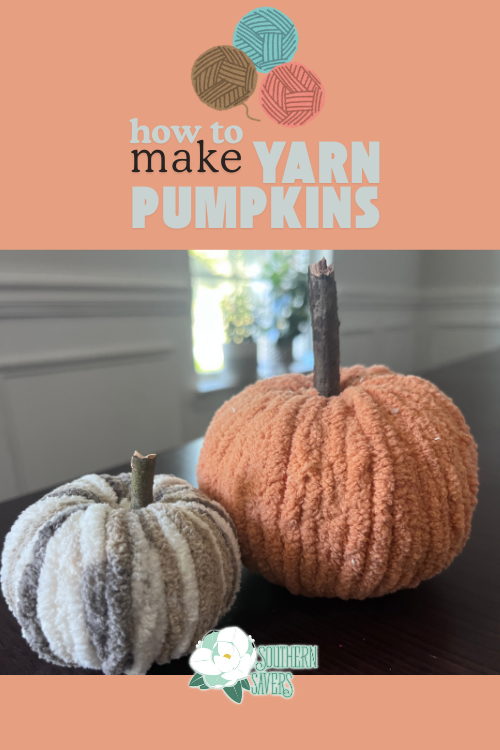
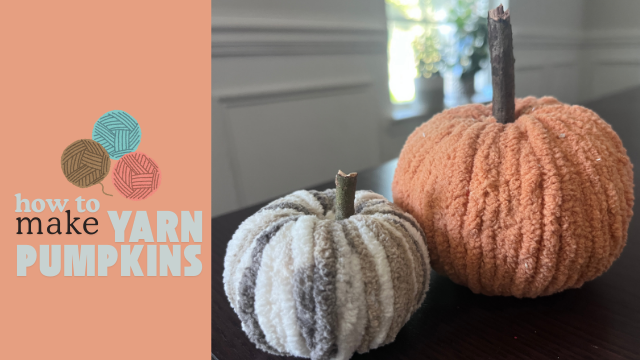
How to Make Yarn Pumpkins
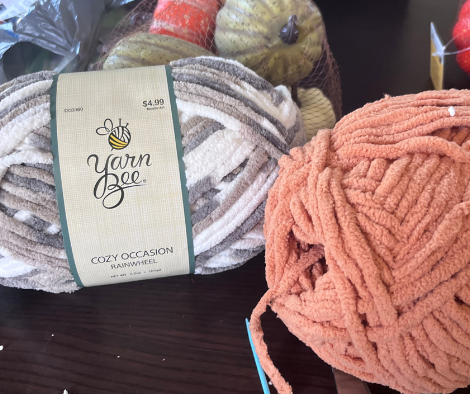
I got everything I needed to make these from Walmart and Hobby Lobby, but these supplies are available all over the place. You’ll need: yarn, foam pumpkins, yarn needles, some sticks from the yard, and something to cut the center hole out of the pumpkin (I used an apple corer). Scissors were also used!/
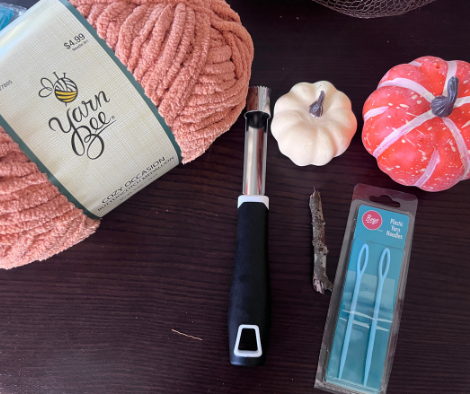
I got large yarn needles because I got bulky yarn. A smaller size might be better if you were using thinner yarn or smaller pumpkins.
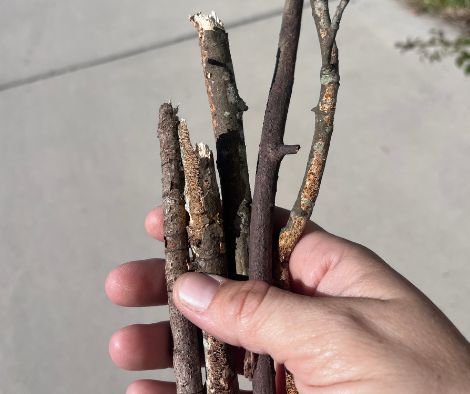
We had plenty of sticks in the yard due to recent hurricanes, so I gathered up a few of those and broke them into smaller pieces.
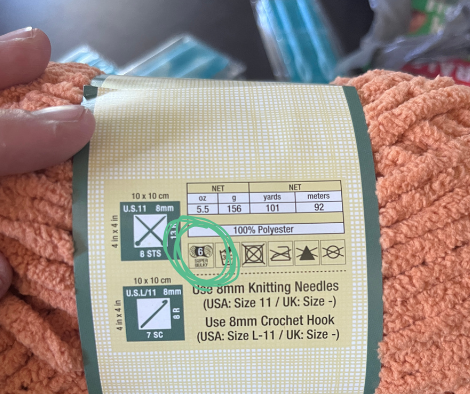
You can use any kind of yarn you want, but I found for the pumpkins I got, 6-gauge yarn was the best. If you look at the packaging, the area that I circled tells you the gauge of the yarn (the higher the number, the thicker the yarn).
These pumpkins came in a set all together, and I decided to start with one of the medium pumpkins first.
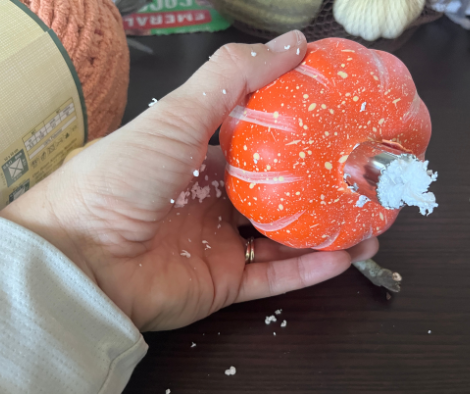
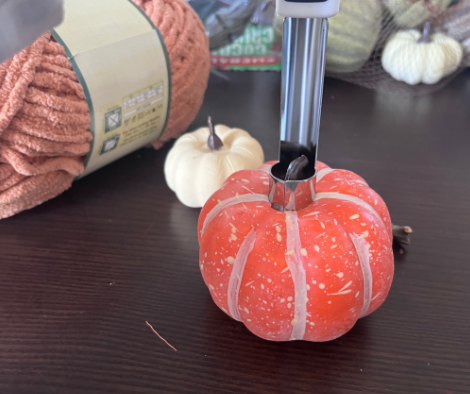
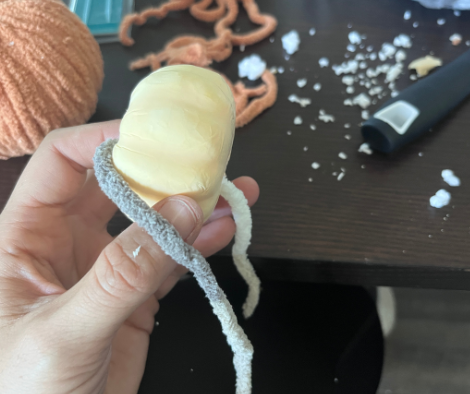
I used an apple corer to get the center out, and it made a huge mess. The foam got everywhere. I decided to just leave it and keep going and clean it all up at the end.
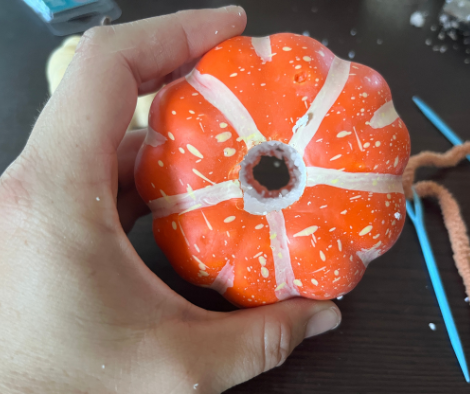
You could also just use a utility knife for this section. The hole may not be perfectly circular, but you won’t be able to tell when you’re finished.
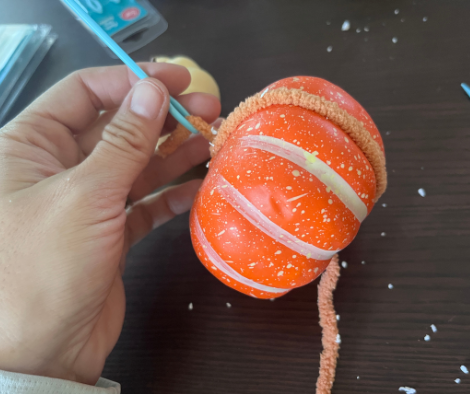
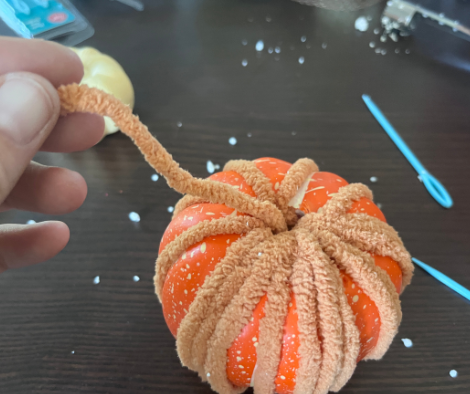
Then you’re going to thread the needle with the yarn and stick it through one end and out the other.
Leave several inches dangling out of one end while you take the needle around the pumpkin and back through the original hole. You may need to hold it down for the first few times you loop it around so that doesn’t come out. When you’re all done, you can just snip off the tail.
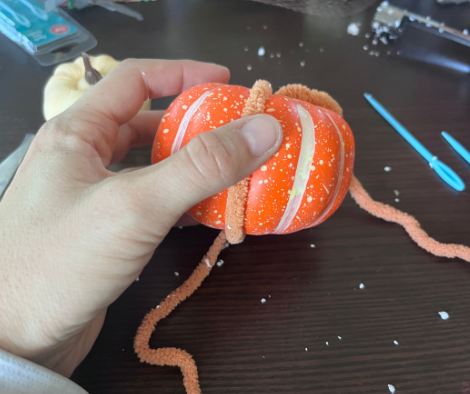
I found it easiest to wrap the yarn around the little ridges in the pumpkin first.
Then you’re just going to keep going in and out, in and out, until the pumpkin is more and more covered.
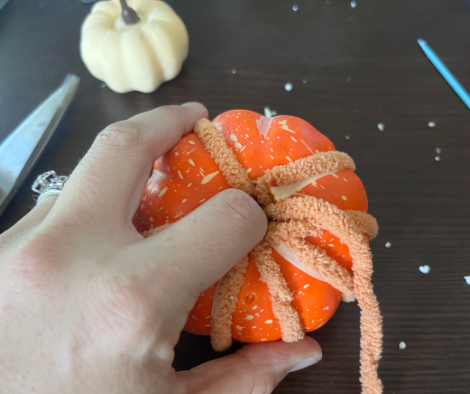
It took a lot more yarn than I expected! If you run out of your length of yarn, no worries. Leave several inches dangling like you did at the beginning, and start again with a new length of yarn. You’ll be able to snip all the tails off at the end.
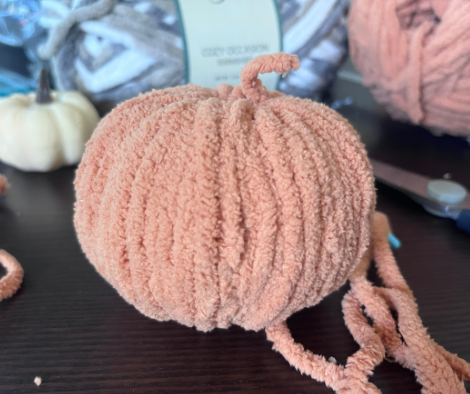
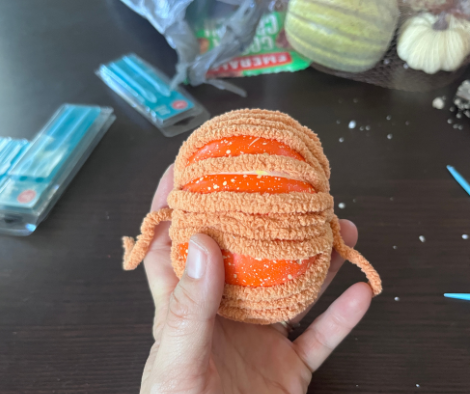
You can see the tails remaining on my pumpkin. I cut them off and you couldn’t even tell.
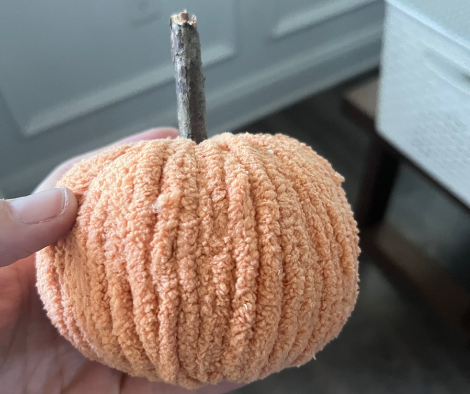
Then just stick one of your little twigs down in the hole for a stem! I love how it turned out.
I also got some variegated yarn to try, which I ended up being obsessed with. Others in our group used multiple colors of yarn and made a pattern around their pumpkins.
This was a smaller pumpkin so didn’t take quite as much yarn.
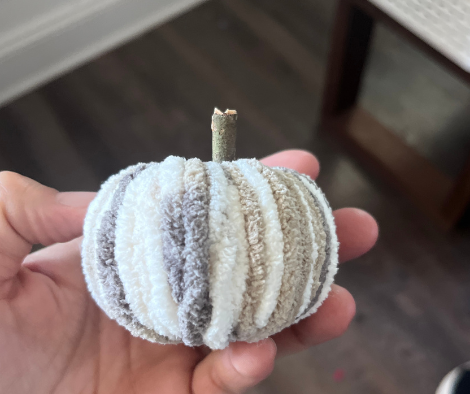
This was my favorite pumpkin of all, and it probably only took about 10 minutes since I’d gotten used to what worked from the first pumpkins. I hope you enjoy making these as much as I did!